![]()
![]()
![]()
![]()

![]()
![]()
![]()
![]()
![]()
![]()
![]()
|
|
|
|
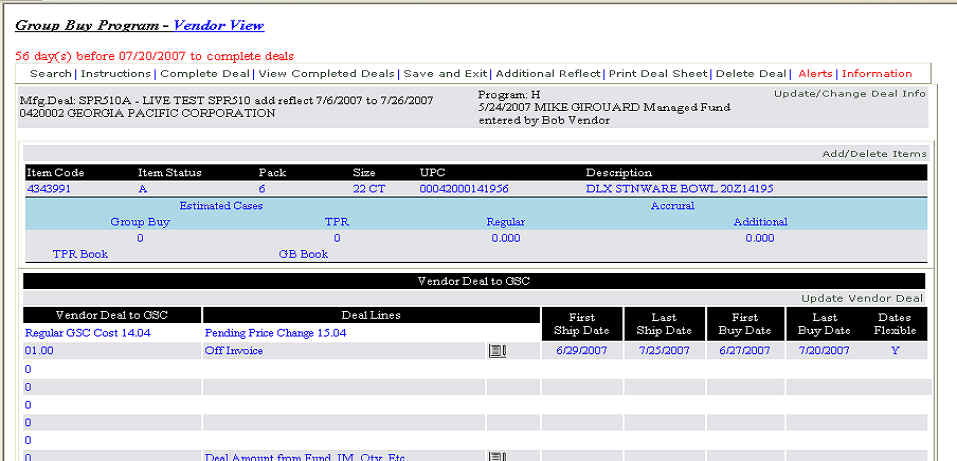
MANAGE DEALSelect the control link you want to review: Search; Instructions; Complete Deal; View Completed Deals; Save and Exit; Print Deal Sheet; Delete Deal; Alert; Informational; Additional Reflect. 
Control links at the top of the Header Section of the Vendor View page provide a number of ways to manage deal sheets. Alternatively, some of these same links are available on the Menu page. The only difference is the page to which you return after completing a control function. The common links are: Complete Deal, Delete Deal, Print Deal, Deal Search. Each is covered under MENU OPTIONS. Search
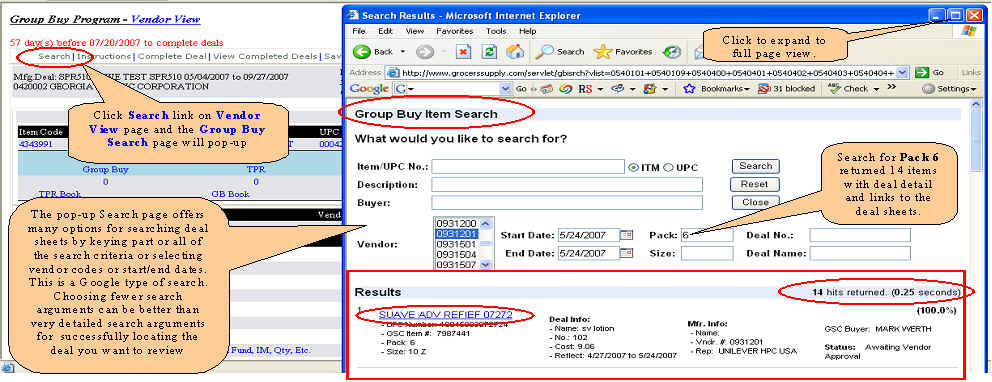
The three (3) buttons that control the Search process are: Search (launch the search); Reset (clear search criteria); Close (leave the Search page and return to the Vendor View page). Instructions
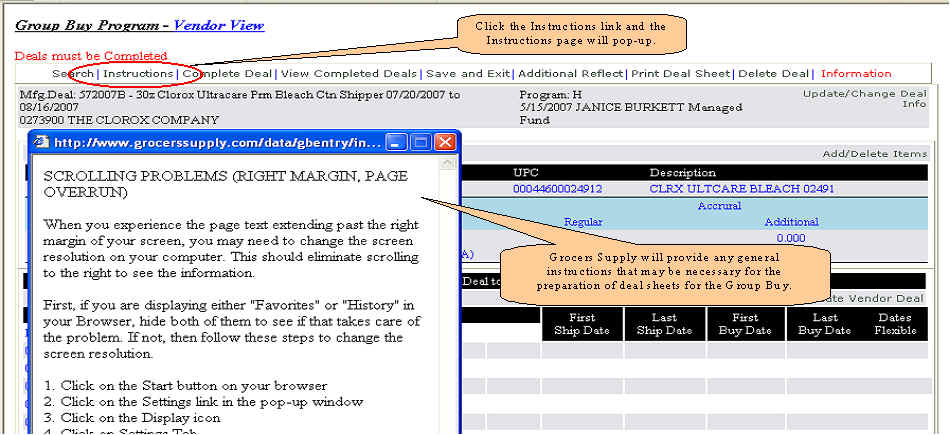
There may or may not be any special instructions for a particular Group Buy period, but you should check to be sure. Complete Deal
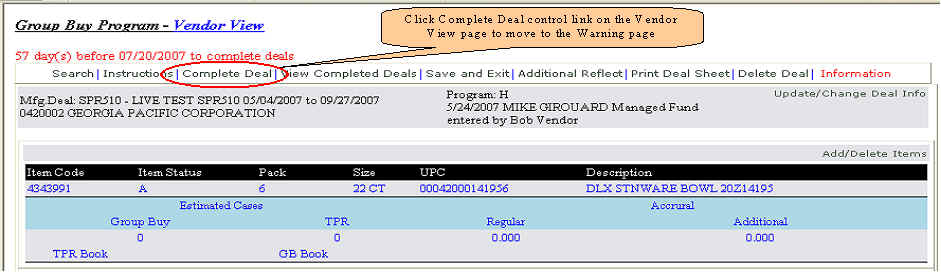
Step 1 of Completing a deal is to click the Complete Deal control link.
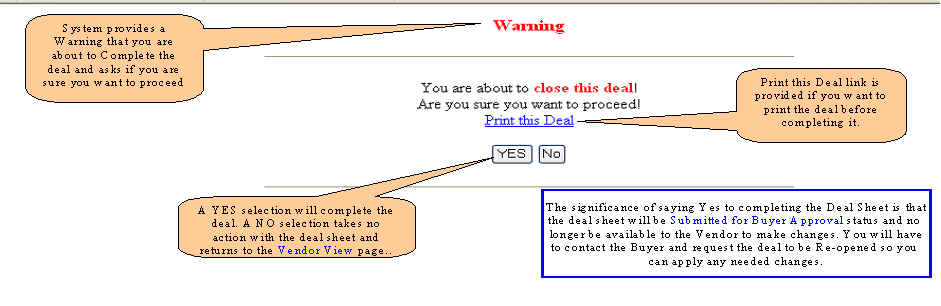
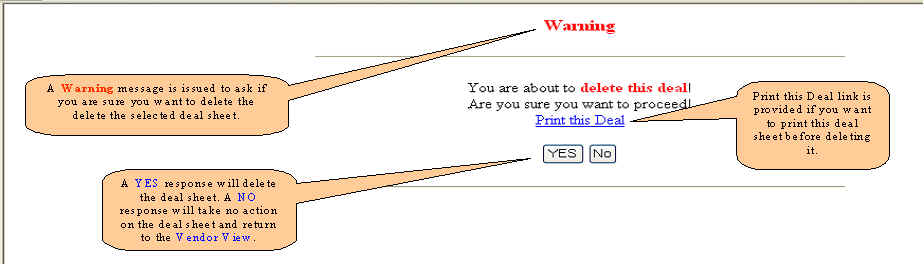
Step 2 of Completing a deal is to click YES to the Warning if you intended to complete the deal sheet and NO if not. If you would like to print the deal before clicking YES for deal completion, just click the Print this Deal link and you will be taken to the print deal function.
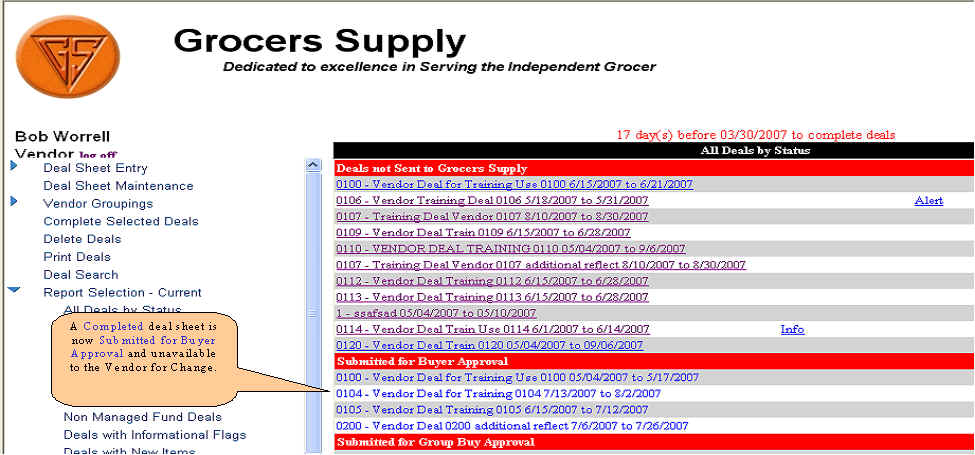
Step 3 of Completing a deal is when the system has moved the deal to the status of Submitted for Buyer Approval and returned to the Menu page. This example shows all of the deals that have been completed by a Vendor and are now in the "Submitted for Buyer Approval" status View Completed Deals
Step 1 is to click the View Completed Deals control link.
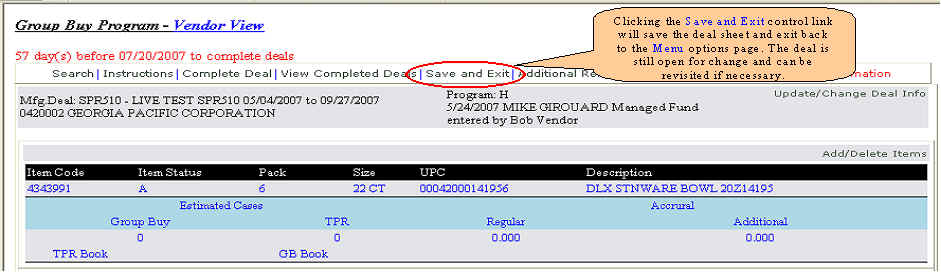
Step 2 is to review the list of completed deal and click on any of the deals on this report to view the details but no changes are permitted at this point. Clicking the browser Back arrow will return you to the Vendor View page. Save and Exit Save and Exit saves the deal sheet in an open status and can be revisited for change or to complete or delete the deal later. Print Deal Sheet
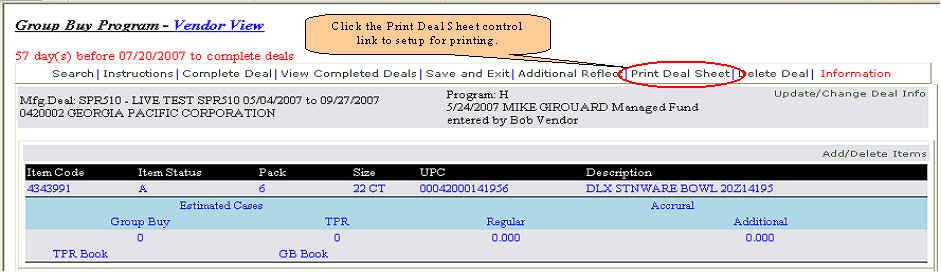
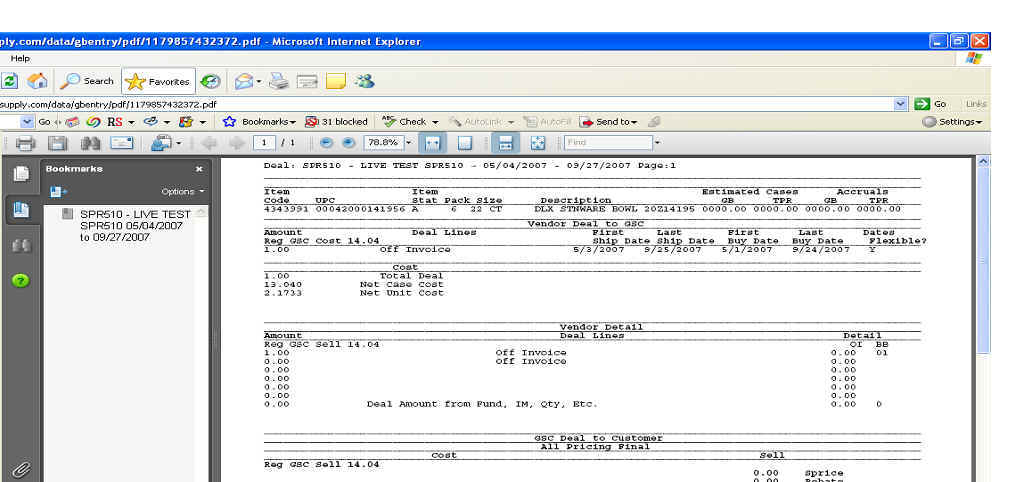
Step 1 for printing the current or many deal sheets is to click on the Print Deal Sheet control link.
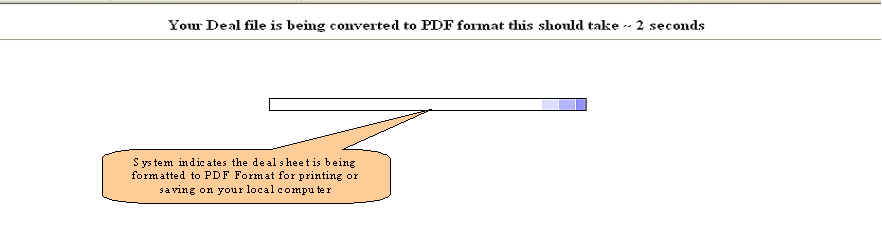
Step 2, the system formats the deal sheet into Adobe PDF format, about 2 seconds. This is just an informational message.
Final step is the display of the deal sheet or sheets in PDF format for saving or printing. Delete Deal
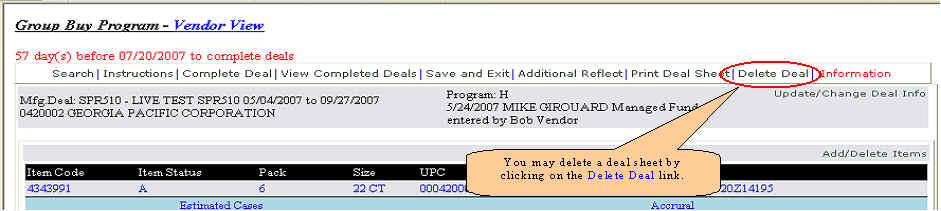
Step 1 is to click the Delete Deal control link.
Step 2 is to be sure you want to delete the deal sheet. You are returned to the Menu options page after the deal sheet is deleted. Alternatively, you will return to the Vendor View page when you choose the NO option. Deleted deal sheets are removed from the system and would require re-entry if the deal is still needed. Alert
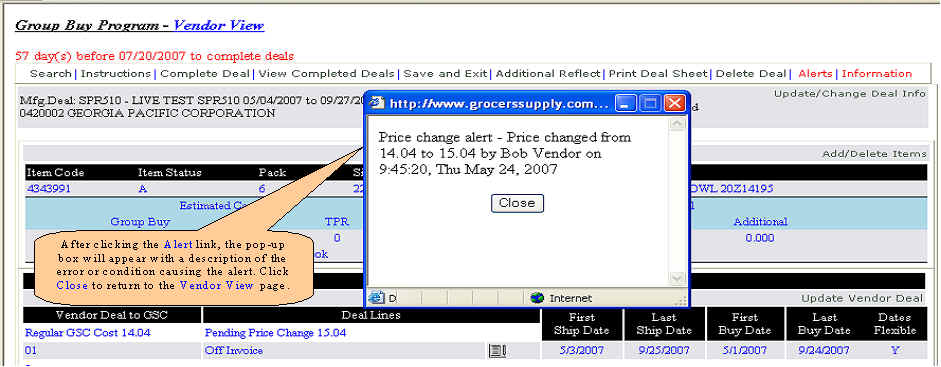
Step 1 is to click on the Alerts control link. Only deals with a possible error condition will have the alert link present.
Step 2 is to review the pop-up message explaining the cause of the Alert. Click Close to return to the Vendor View. Informational
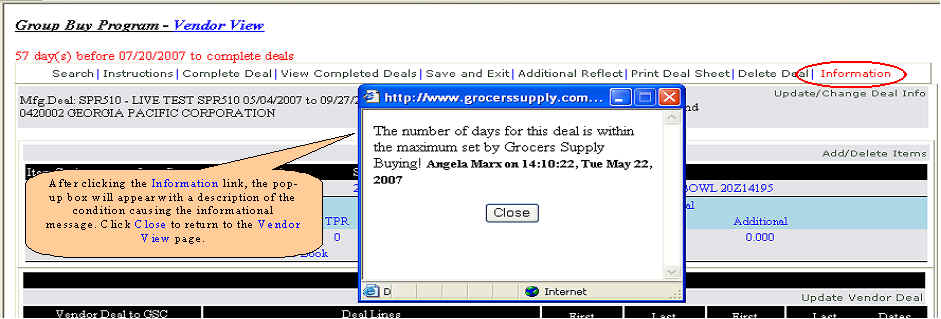
Step 1 is to click on the Information control link. Only deals with an informational message will have the information link present.
Step 2 is to review the pop-up message to understand the reason for the informational message. Click Close to return to the Vendor View. When you need to create a deal based on an existing deal that has a different Reflect Date period, you use the Additional Reflect control link. The process of building the new deal sheet is the same as that used to create a new deal. There are some variations in the data required but the steps are the same.
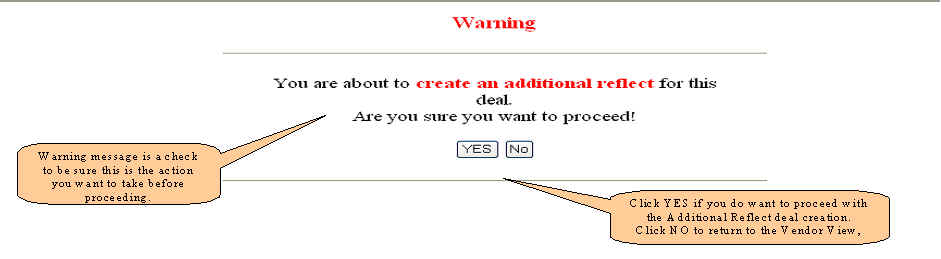
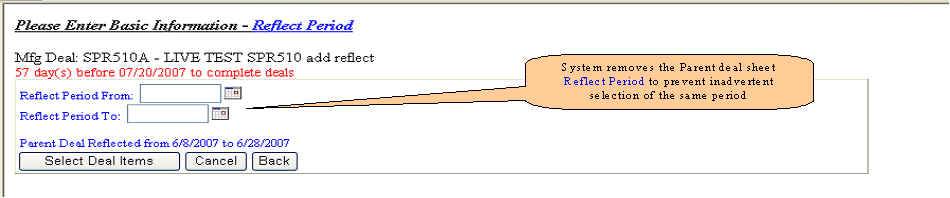
The system is checking to be sure you did not click the Additional Reflect link inadvertently.
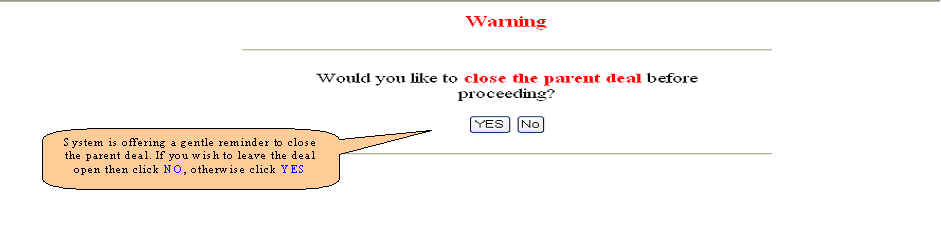
The system is reminding you to close the parent deal. It is not required to close the deal in order to proceed with building the new Additional Reflect deal creation.
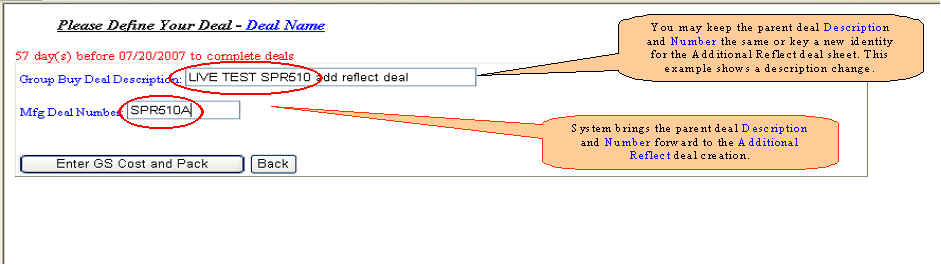
As with building a new deal, you may want to provide a different Description and Number as shown in this example, but it is not required.
You need to provide the new reflect date period for this deal sheet.
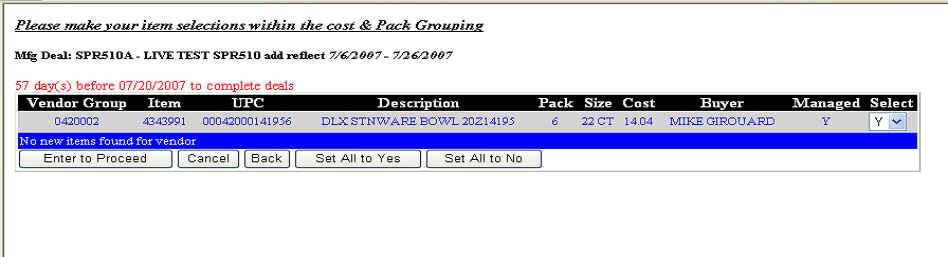
Select the items to include on the Additional Reflect deal sheet or if unchanged from the parent deal just click the Enter to Proceed button.
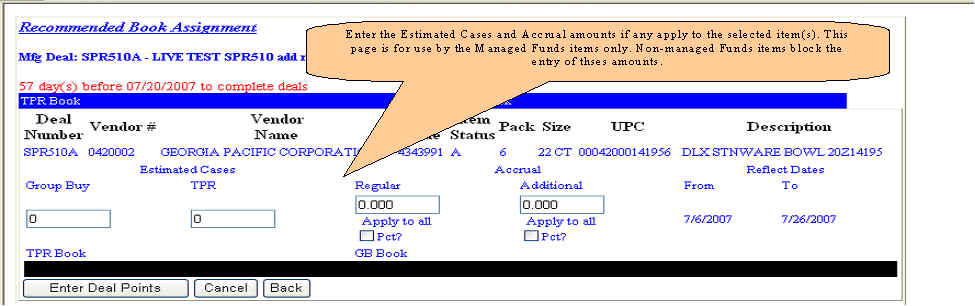
Managed Fund vendors only would enter Estimated Cases and Accruals if any apply. This page does not apply to Non-managed Fund vendors and entry of these amounts is blocked.
Although the system remembers the Cost Basis and Deal Points from the parent deal sheet, you may change them as necessary for the Additional Reflect deal sheet. Notice this is the same process used to create a new deal sheet. The Last/First Ship/Buy dates are blanked when you land on this page so you will need to provide these dates in order to complete the deal.
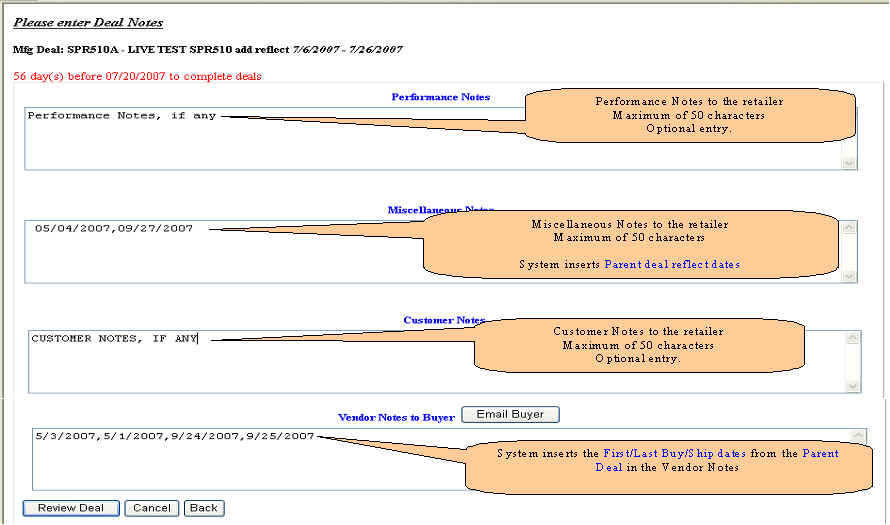
You may add, change or delete the notes the system remembers from the parent deal sheet. The system inserts note text from the parent deal sheet for the previous Reflect period and Ship and Buy dates as a tracking assist for related deal sheets.
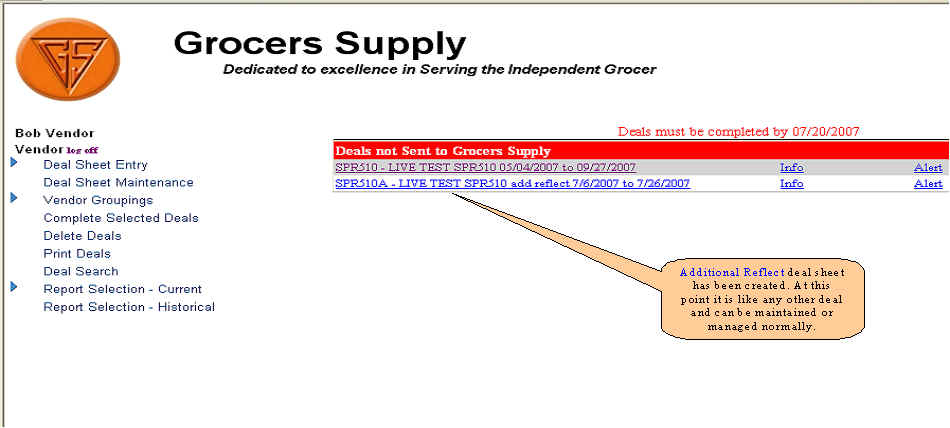
At this point the Additional Reflect deal sheet has been created.
The Additional Reflect deal sheet is now listed under Deals Not Sent to Grocers Supply. |
|
Send mail to GBSupport@grocerybiz.com with
questions or comments about this web site.
|